How to Use Proxy with OpenVPN or WireGuard on Windows, macOS, iOS, Android, Ubuntu
If your proxy includes the VPN Add-on, you can connect via OpenVPN or WireGuard on multiple devices and operating systems.
Step 1 – Download Your VPN Configuration
Go to the My Proxy page in your account.
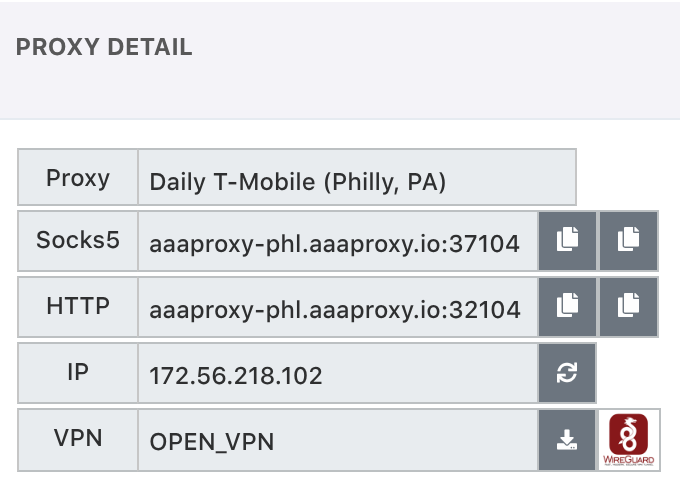
In the Quick Action Icons for your proxy, click Download VPN File.
You will receive a file named
vpn.zip.-
Unzip the file:
OpenVPN users: you will find a
.ovpnfile.WireGuard users: you will find a
.conffile.
Using OpenVPN
1. Download and Install OpenVPN Client
Visit https://openvpn.net/client/.
-
Select and download the client version suitable for your device:
Windows – OpenVPN Connect for Windows
macOS – OpenVPN Connect for macOS
Linux/Ubuntu – OpenVPN package for Linux
Android – OpenVPN Connect from Google Play Store
iOS (iPhone/iPad) – OpenVPN Connect from Apple App Store
2. Import the Configuration File
Windows/macOS/Linux:
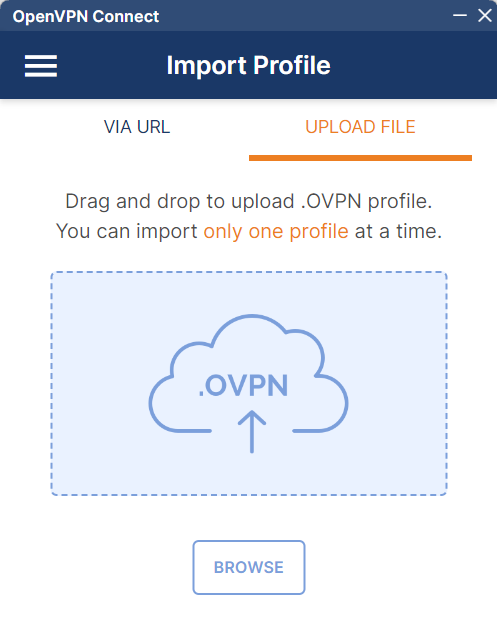
Open OpenVPN Connect → Click Import Profile → Select your.ovpnfile.Android/iOS:
Open the OpenVPN Connect app → Tap File or Import from File → Select your.ovpnfile (downloaded/unzipped to your device).
3. Connect to the VPN
Click Connect in the OpenVPN client.
Once connected, your device will be linked to your SIM-based proxy via OpenVPN.
📌 Reference Guide: OpenVPN Import Instructions
Using WireGuard
1. Download and Install WireGuard Client
-
Select and download the client version suitable for your device:
Windows – WireGuard for Windows
macOS – WireGuard for macOS
Linux/Ubuntu – WireGuard package for Linux
Android – WireGuard from Google Play Store
iOS (iPhone/iPad) – WireGuard from Apple App Store
2. Import the Configuration File
Windows/macOS/Linux:
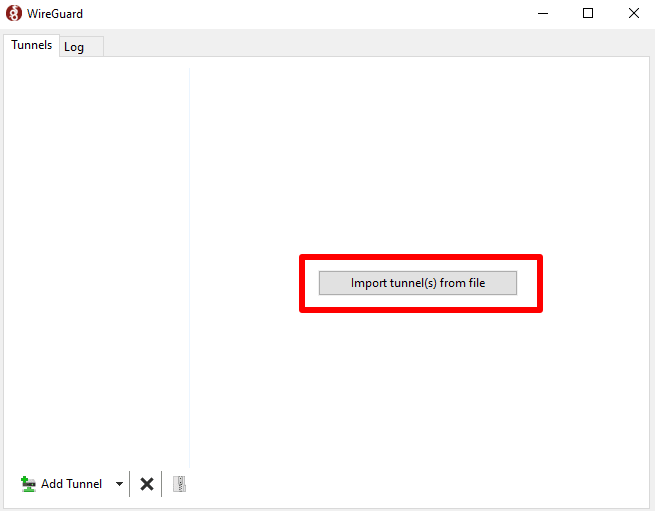
Open WireGuard → Click Import tunnel(s) from file → Select your.conffile.Android/iOS:
Open WireGuard → Tap Import from File or Archive → Select your.conffile.
3. Activate the Tunnel
The tunnel will appear in the WireGuard app.
Select it and click Activate (Windows/macOS/Linux) or Toggle On (mobile).
You are now connected to your SIM-based proxy via WireGuard.
Step 4 – Verify Your Connection
Check your IP, DNS, and browser details here:
🔗 https://browserleaks.com/
Switching Between VPN Types
Go to My Proxy Page.
Use the Quick Action: Change VPN Type button.
Download the new VPN setup file.
⚠ Note: Only one VPN type can be active at a time.
The old configuration file will no longer work after switching. Always import the latest file before connecting.